Step 1: Create your account
Go to copilot.scanoengage.com and fill in your Full Name, Clinic Name, Clinic Website URL, Work Email, and Password. You can also sign up using Google. Once done, click the sign-up button.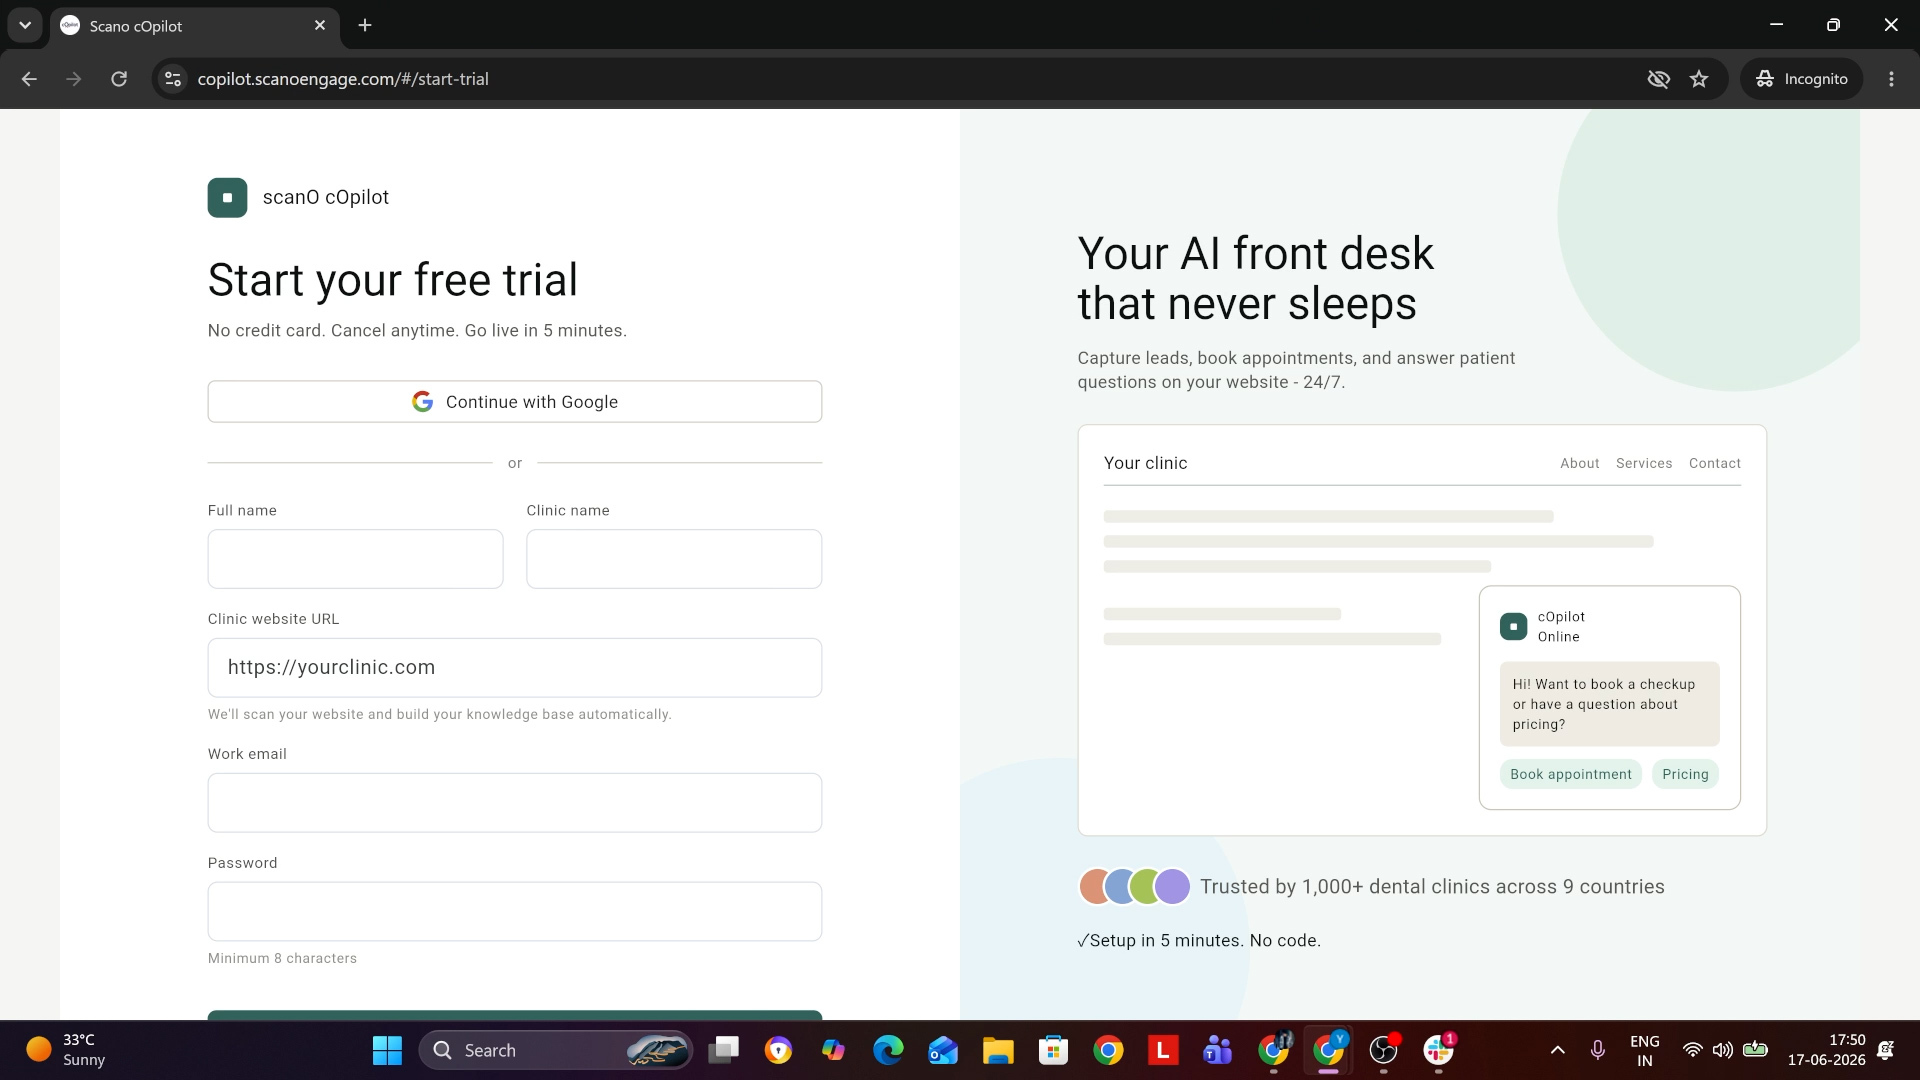
Step 2: Log in to your account
After your profile is created, you’ll see a confirmation message. Enter your email and password and click Log In to continue.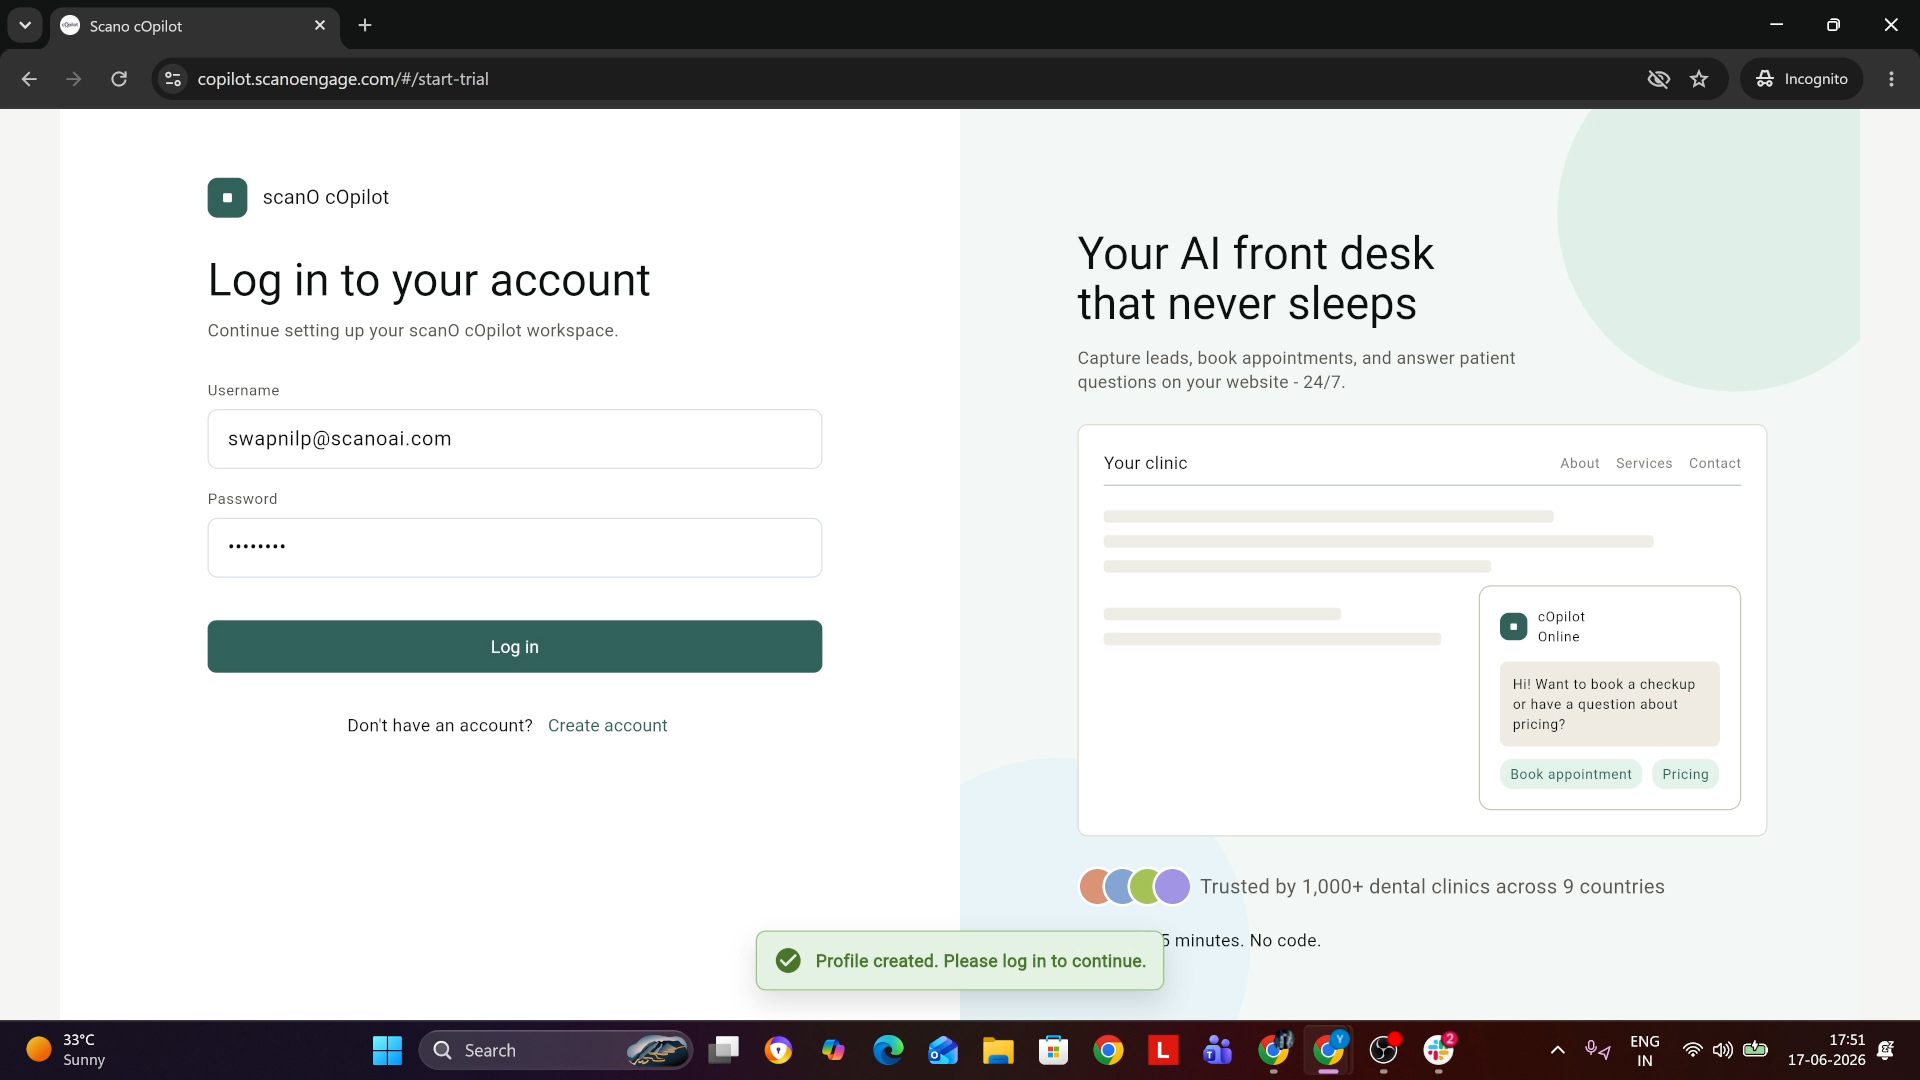
Step 3: Wait for the knowledge base to build
scanO cOpilot will automatically scan your website and build a knowledge base. You’ll see a progress bar saying “Building Knowledge base… Please wait.” This usually takes a few seconds.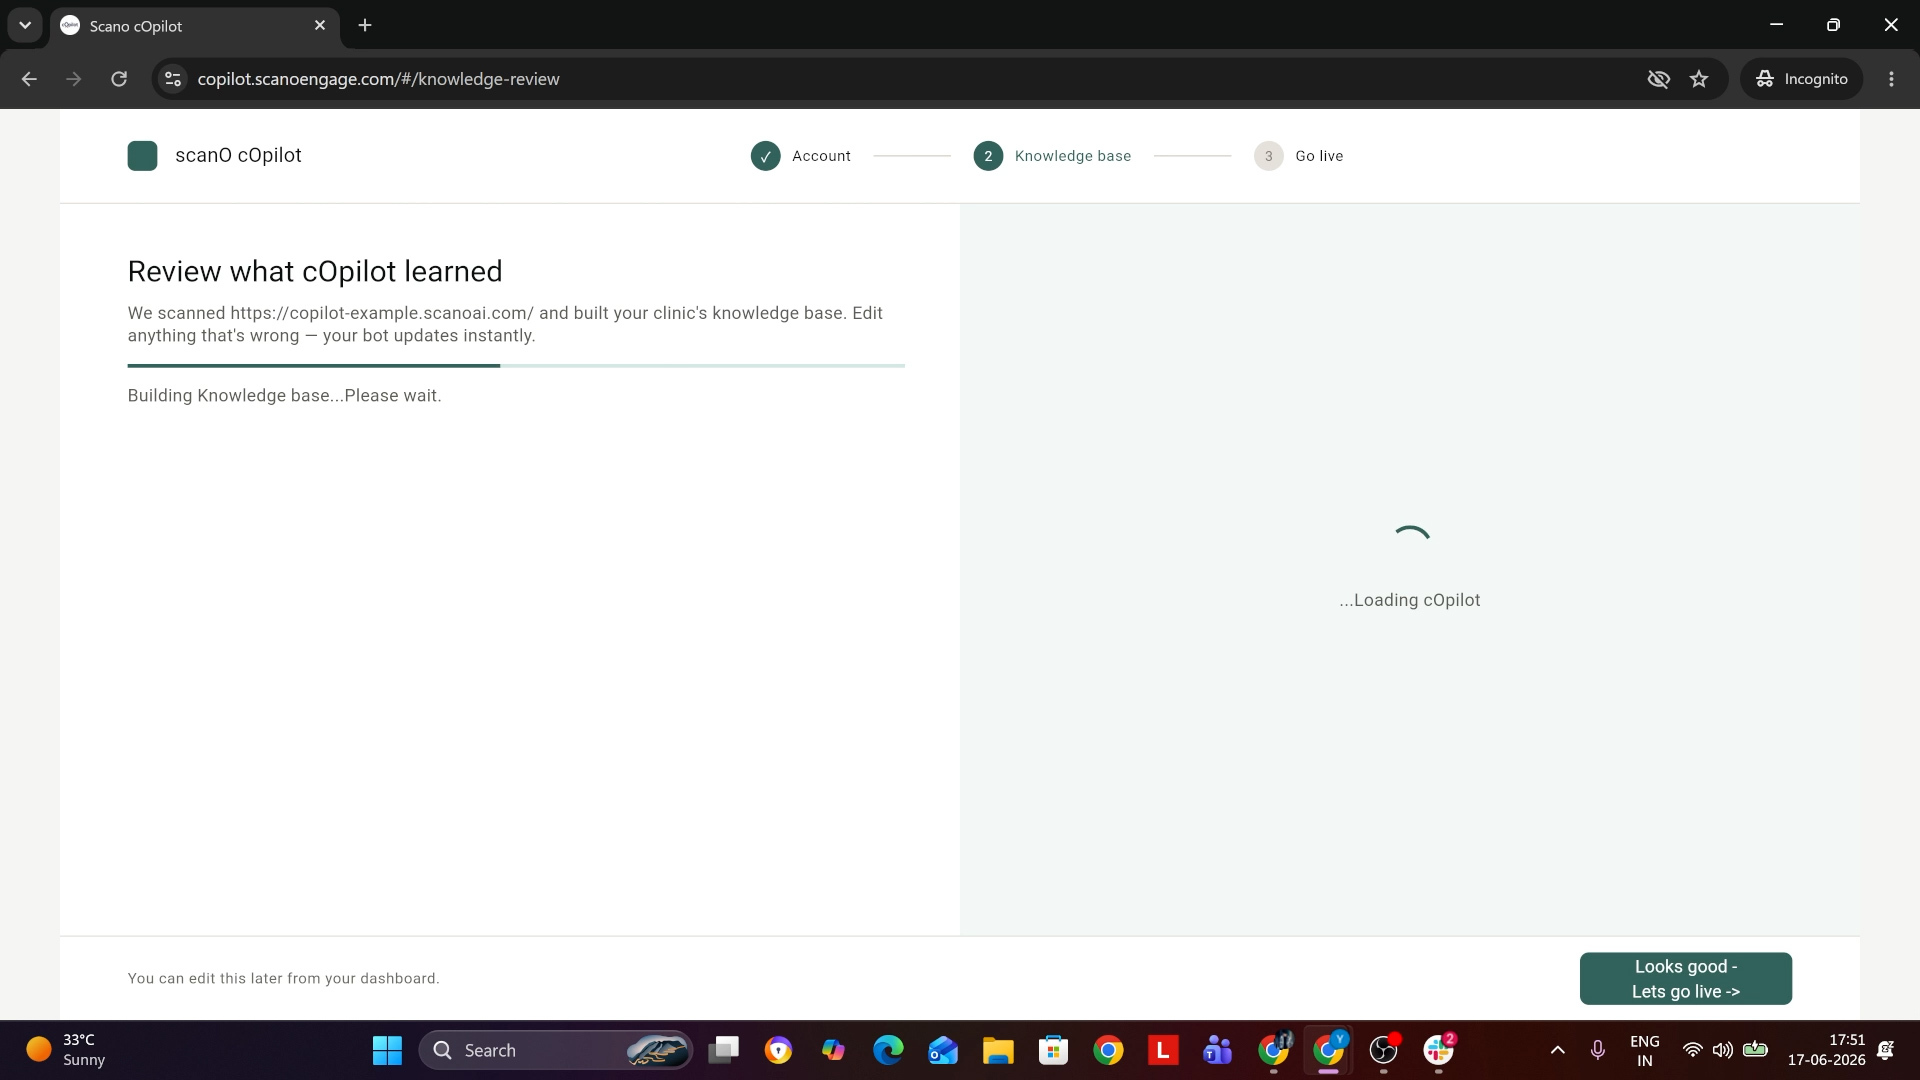
Step 4: Review and edit your clinic details
Once the scan is complete, you’ll be taken to the “Review what cOpilot learned” page. Here you can see your Clinic Name, Team, and Services Offered. If anything is incorrect, click the Edit button to update it. Your bot updates instantly with any changes.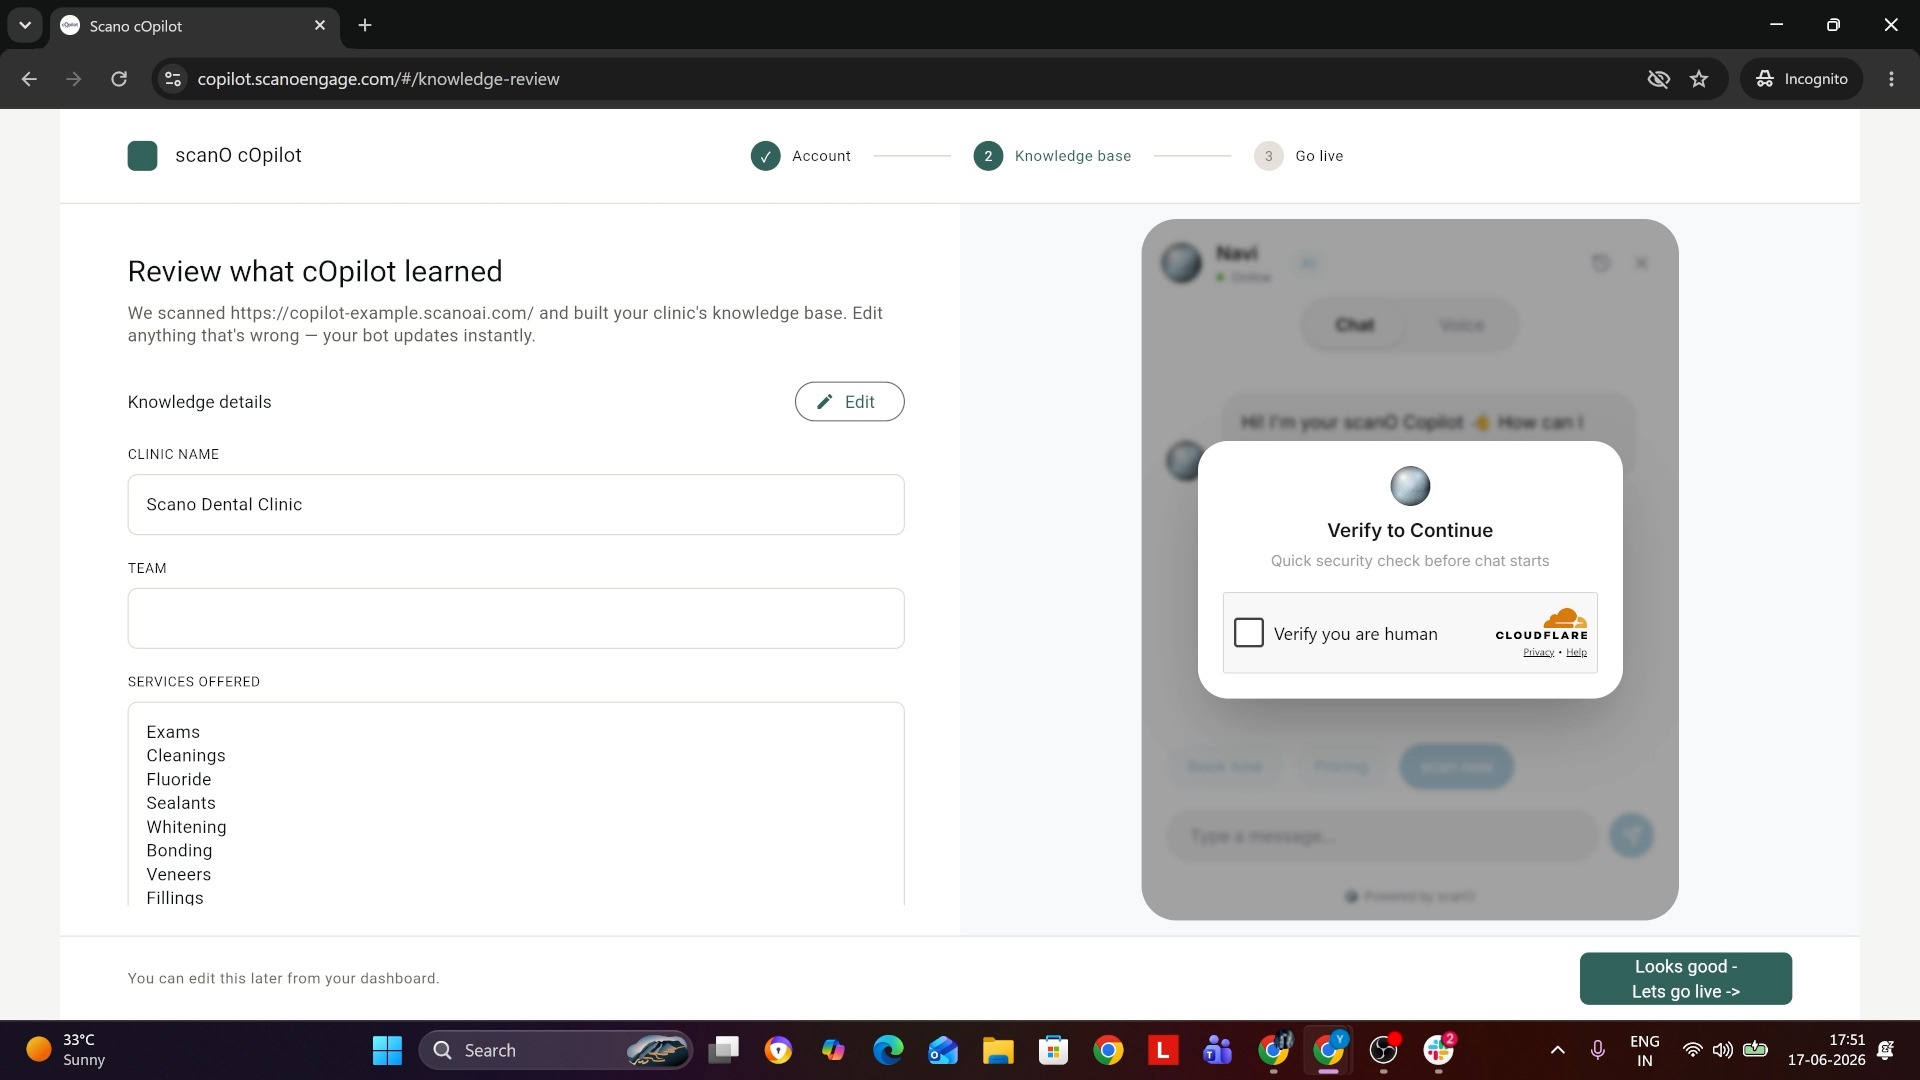
Step 5: Copy and install the code snippet
Next, you’ll reach the “Add cOpilot to your website” page. Click Copy to copy the script snippet. Paste it before the closing </head> tag of your website. The same snippet works on any website or framework. cOpilot will automatically detect the installation, usually within 60 seconds.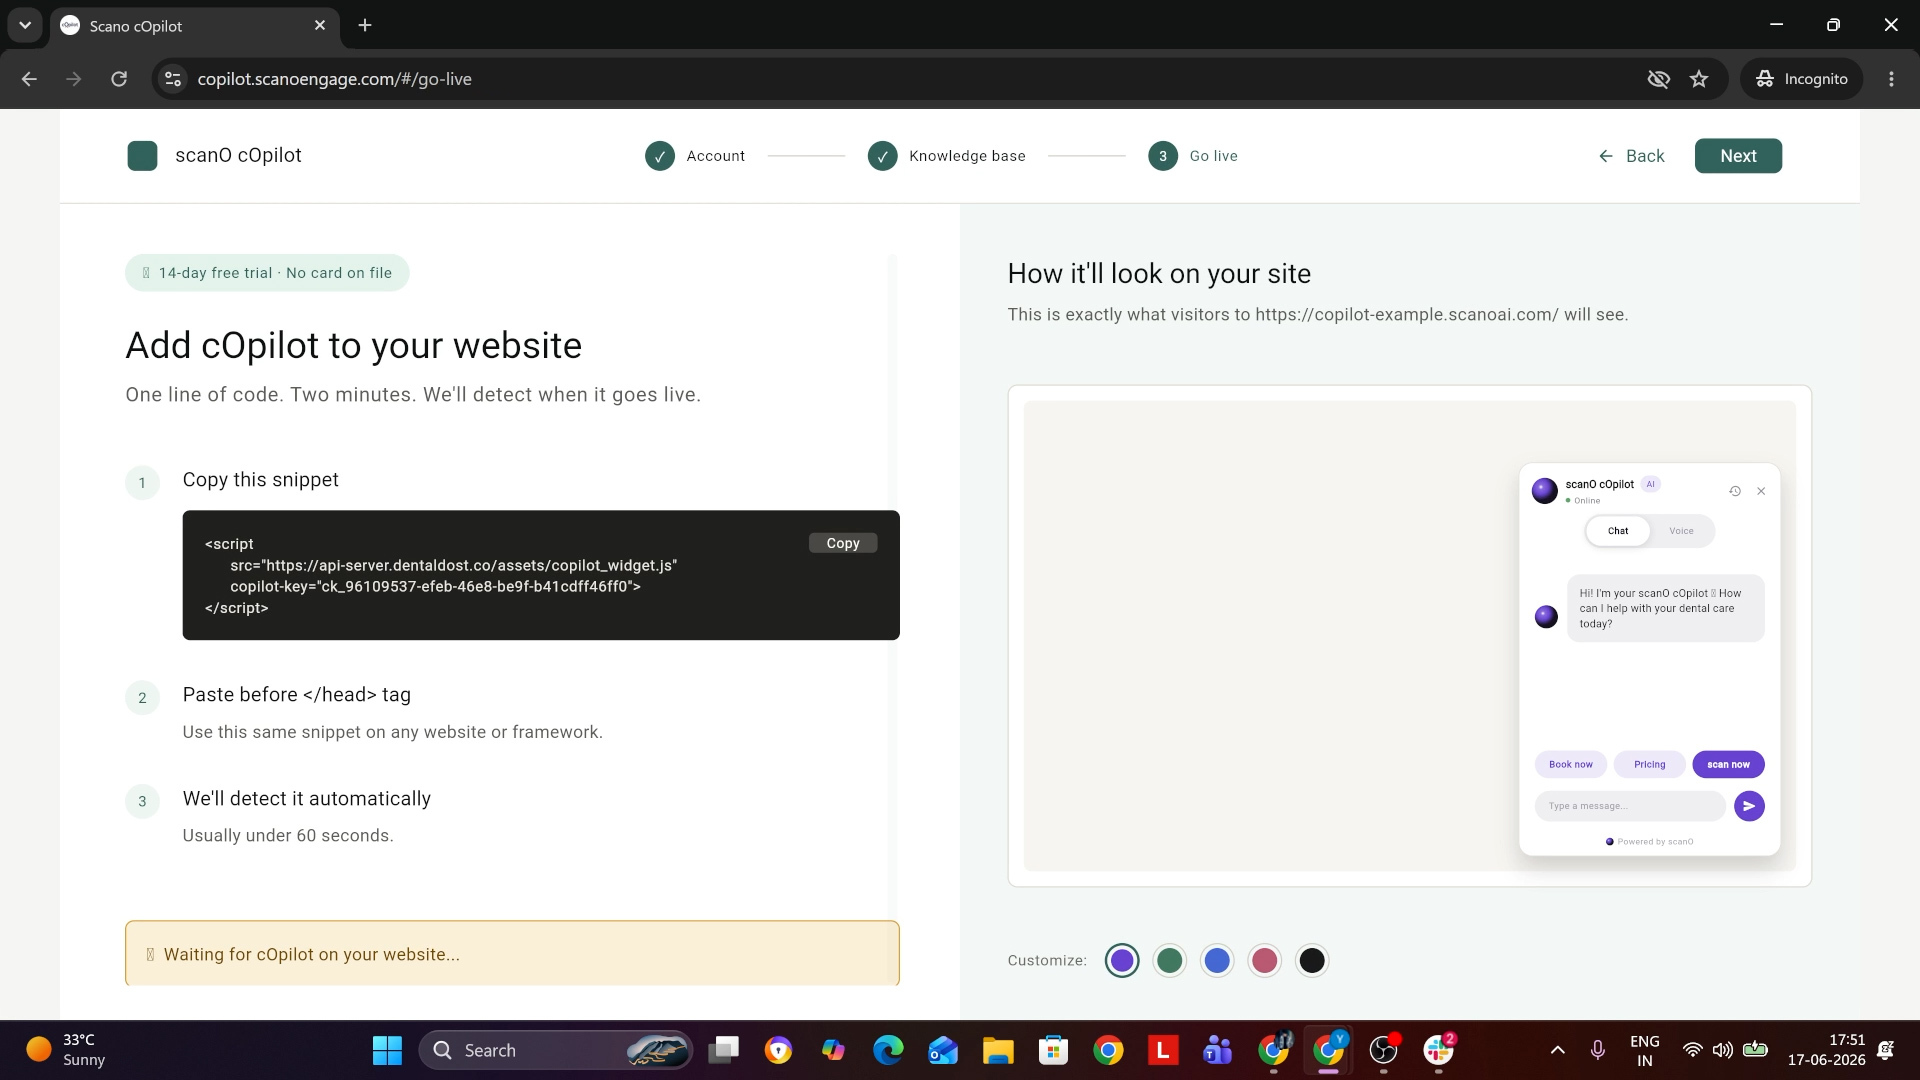
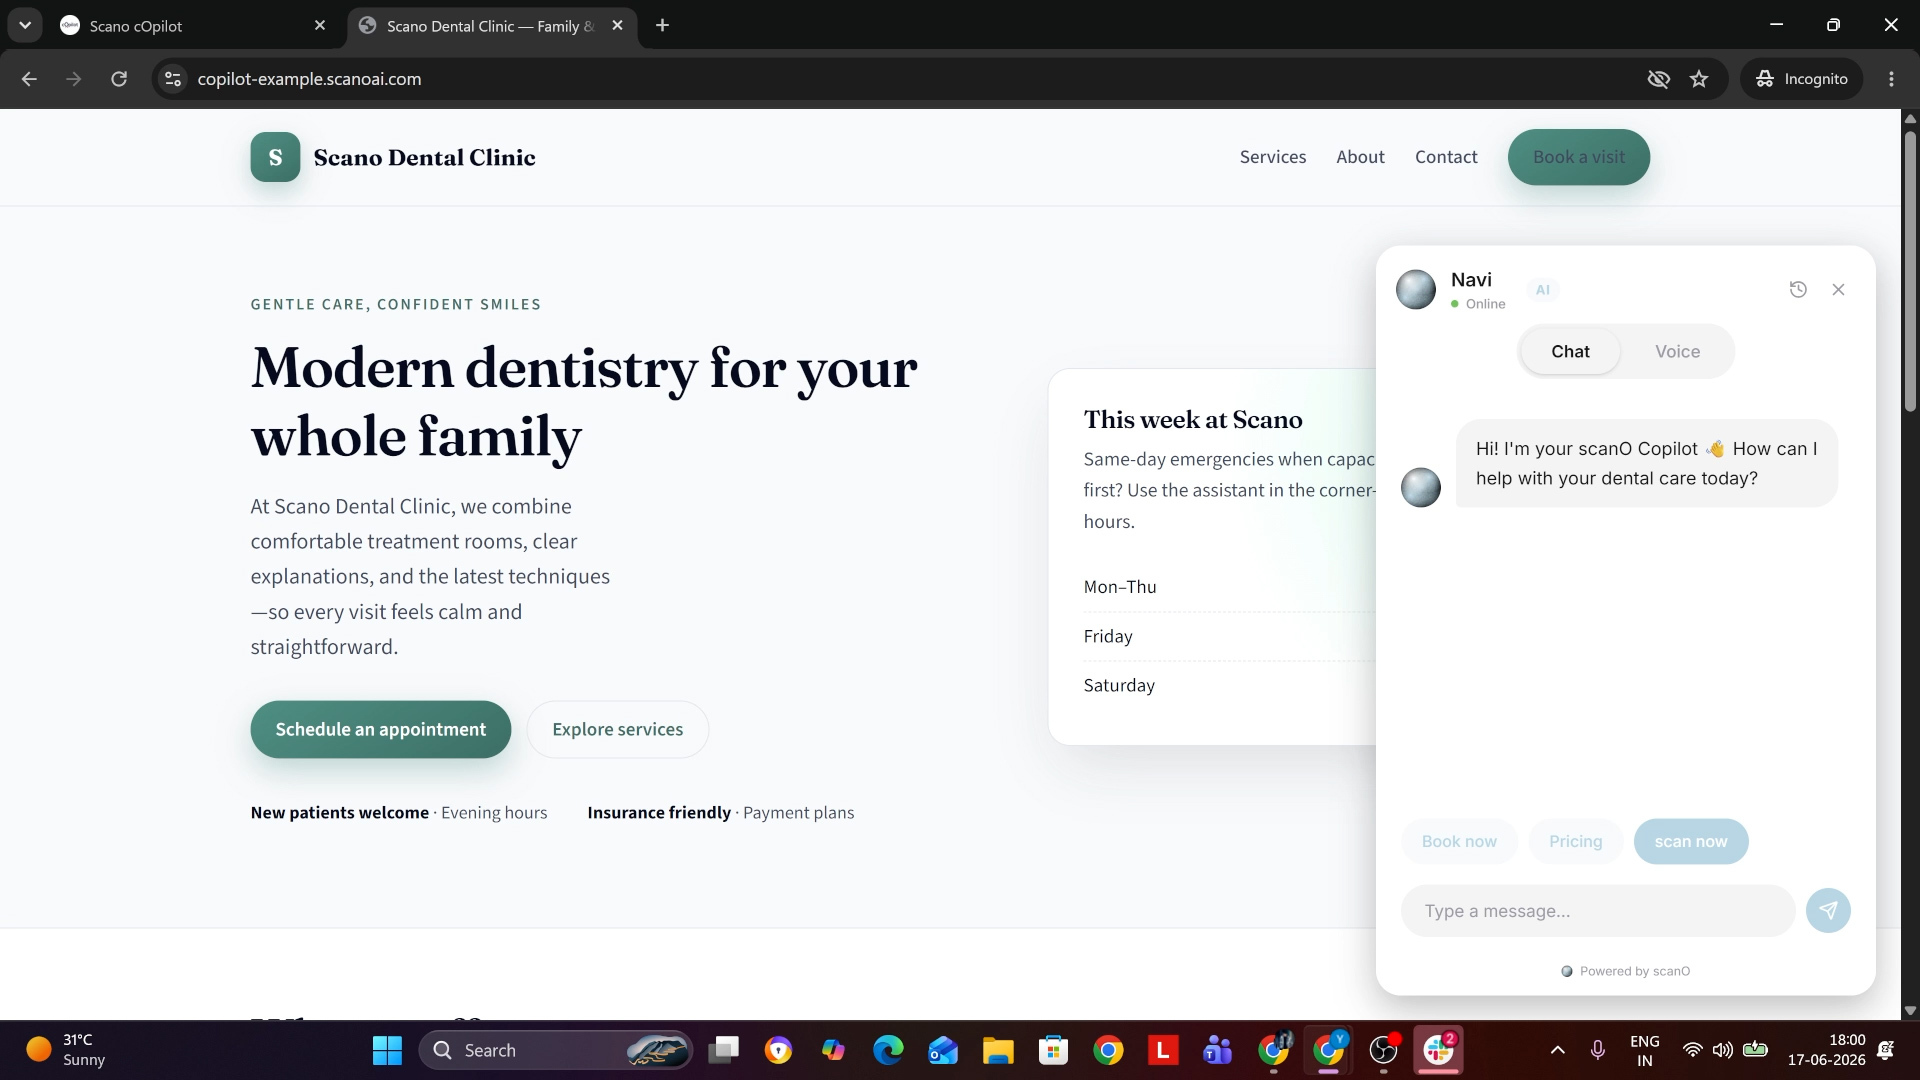
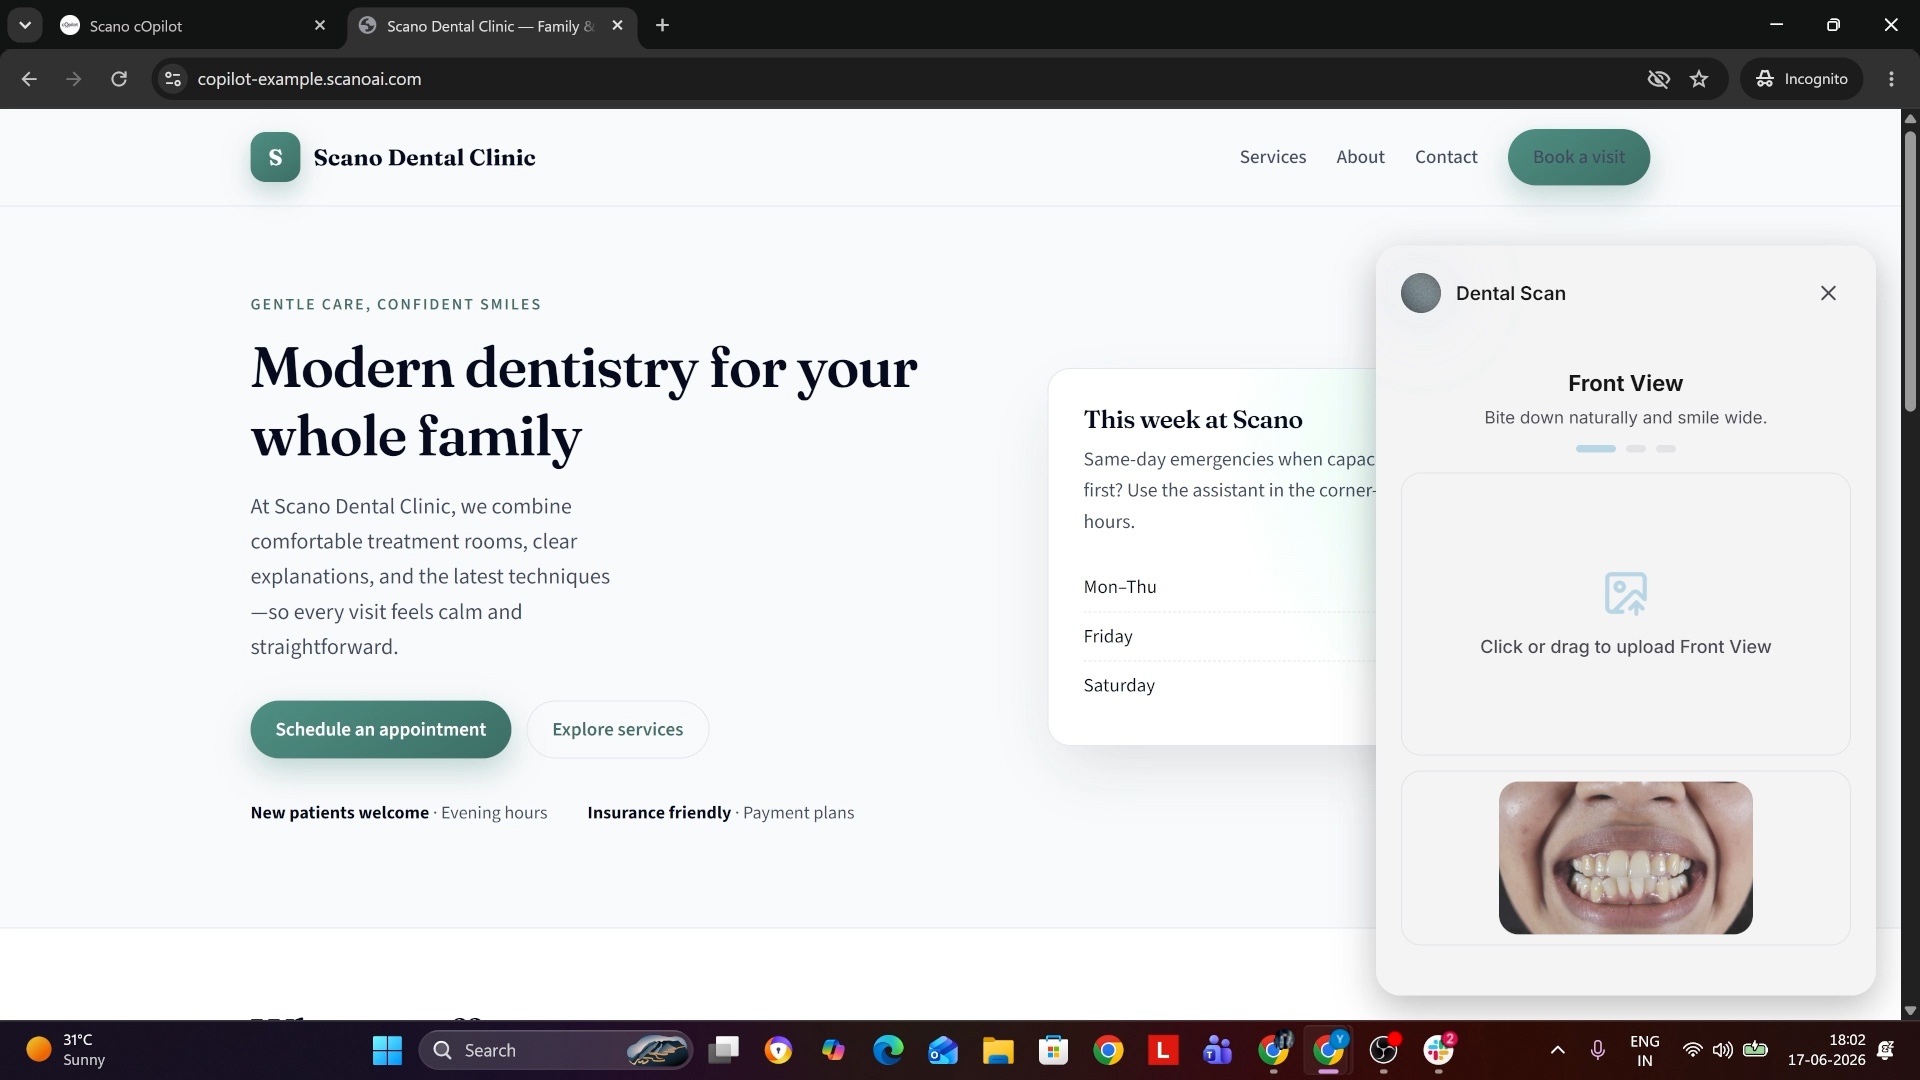
Step 6: cOpilot is now live on your website
Once installed, visitors will see the cOpilot chat widget on your website. They can ask questions, book appointments, check pricing, or even submit a dental scan — all powered by AI.
Archives: FAQs
-
How to Set Up scanO cOpilot on Your Website?
How to Set Up scanO cOpilot on Your Website?